All topics
The network drive
Files and websites
Cameras and sensors
Getting Started
NAS Reborn turns a spare iPhone or iPad into a network drive for your home. You need a few minutes and a power outlet to set one up. The same app runs on an old Mac as well.
What you need
- An iPhone or iPad running iOS 15 or later. This covers the iPhone 6s, iPhone SE, iPhone 7 and every iPhone since, the iPod touch (7th generation), and the iPad Air 2, iPad mini 4 and every iPad since. Devices from around 2014 and later can be used.
- Or a Mac running macOS 12 or later, Intel or Apple silicon, which covers Macs from 2015 on. The Mac version is the same purchase and behaves a little differently; see NAS Reborn on a Mac.
- A charger and a spot with Wi-Fi. The server is meant to run around the clock, so you should leave the device plugged in.
First launch
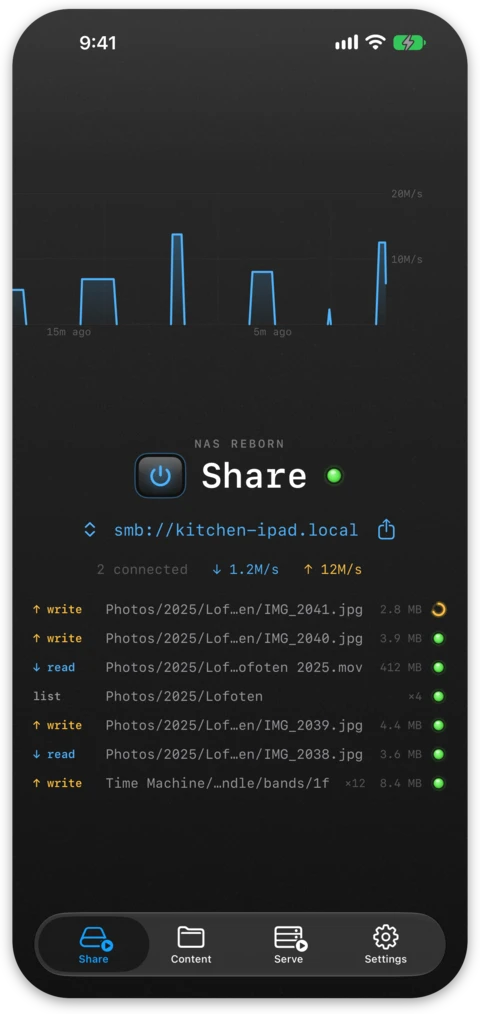
Install NAS Reborn on the spare device and open it. Sharing starts when you tap the power key on the Share tab. The device asks for two permissions, one at a time:
- Local Network is used to announce the drive on your network. Without it other devices cannot discover the server, and the app tells you when access has been denied.
- Notifications are used by the watchdog that alerts you if the server stops. You are asked the second time you start sharing or serving, which keeps the first start down to a single prompt.
A fresh install comes with a Welcome folder containing a Read Me file with connection instructions, and one S3 access key for later. You can rename, replace or delete all of it. The first device account is offered or created when something first tries to sign in.
See it appear
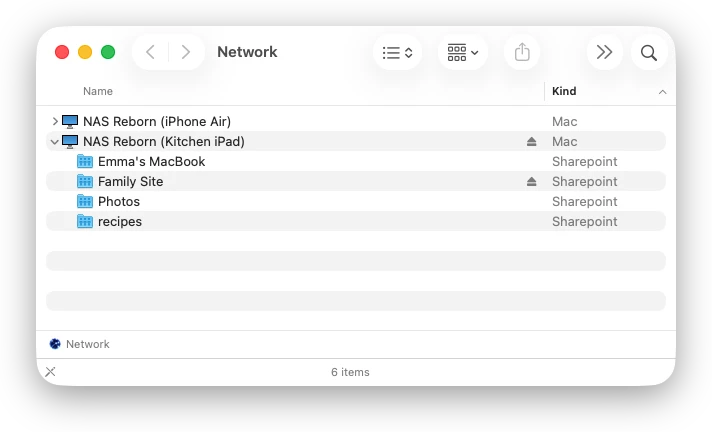
When sharing is on, the device shows up as a computer named "NAS Reborn (model)", such as "NAS Reborn (iPad Air 2)", on your network:
- in the macOS Finder under Network in the sidebar,
- in the Files app on another iPhone or iPad, using Connect to Server,
- in Windows Explorer under Network.
Sign in with a username of your choice. The server notices the first attempt on its Share tab and offers to create that account. The username is taken from your attempt and you pick the password on the server, then you type that password into the login sheet still waiting on the other screen. The Share tab also lists the exact addresses to type when browsing does not find the server. Details for each platform are in The Network Drive.
From here
- Point Time Machine at the device and back up your Mac to it. See Time Machine Backups.
- Add folders and decide what each one is: an SMB share, an S3 bucket and, when public, a website. See Folders, Access and Websites.
- Make the setup permanent with Guided Access and charging guidance. See Always-On Serving. On a Mac the app serves in the background instead; see NAS Reborn on a Mac.
- Opt into web serving on the Serve tab when you want the wider internet. See Your Address and HTTPS.
- Put the device's camera on the network as a live video stream, with Pro. See Camera Feeds.
- Read your Apple Home accessories (iOS 16.2 or later, macOS 13.1 on a Mac) and the device's own sensors, and chart them. See Home and Sensor Data.